
Flatware DIY Designs
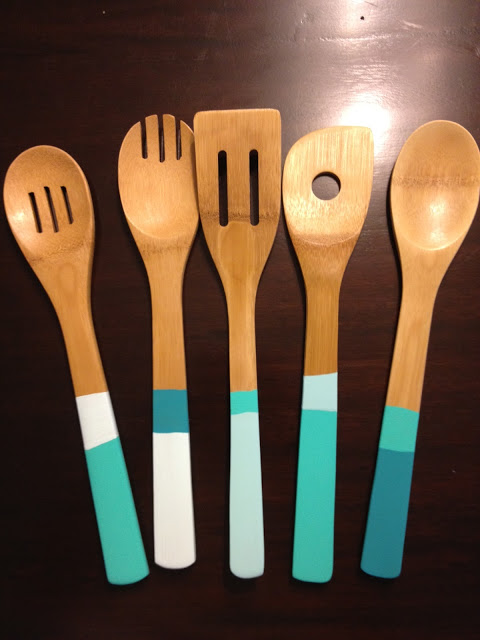
If you’re counting down to a certain meal next week like we are… you’ve got food on the brain! As we prepare for family and feasts, we’ve got a fun flatware DIY perfect for your Thanksgiving table! Color blocking isn’t just for fashion, check out this colorful update you can easily do!

Special thank you to creatively Christy for inspiration!
To start, ready your Preval Sprayer and fill with a food safe paint. It is important to make sure you’re not sacrificing health with your color choices, as some paints require lead for coloring, which is toxic. Most craft stores carry safe brands, so be sure to check the labels! One environmentally friendly option is Milk Paint.
WHAT YOU’LL NEED
- 1 x Preval Sprayer
- 1 x Metal primer (not applicable to wooden serving utensils)
- 1 x Flatware of your choice
- 1 x Roll of painter’s tape
- 1 x Box of sandwich bags
- 1 x Roll of freezer paper
STEP 1
Although it seems self explanatory, CLEAN YOUR UTENSILS! Make sure there is no residue and utensils have completely dried before you start.
STEP 2
Wrap neck of utensil with painter’s tape, being careful to make a straight horizontal line; also make sure you press the tape into any grooves to prevent bleeding or dripping.
STEP 3
Wrap the head of the utensil with the sandwich bag and secure with more painter’s tape.
STEP 4
Cover your work area with freezer paper to create a non-porous, stick free surface.
STEP 5
In a well ventilated area, hold utensil by the head and apply metal primer on all sides. Repeat. (As tempting as it is, don’t spray one heavy coat of primer. It will create drips and also fill in the delicate carvings in the metal.) Allow primer to dry.
STEP 6
After laying your utensils across your work space, spray your handles with a sweeping motion. It is better to use light strokes, with multiple coats. Allow handles to dry between coats, especially before spraying different sides.
STEP 7
Once handles are completely dry, remove baggies and tape and set your table!
If you’ve got patience, experiment with color blocking and patterns!


